


I had SO MUCH fun creating these projects to share with you. I am in love with the new Cricut Iron-On vinyl. I just love the adorable things that I have made with it.
My biggest bit of advice.... don't forget to FLIP your images so that they come out correct.
Another tip... the shiny side of the vinyl (the plastic coated side should go face down on your cutting mat)
I used Boho-Graphics to create this unique and personalized purse.
I used Cricut iron-on glitter in black and silver.


If you are wondering how the silver detail was done... I took the image and copy and pasted it then I moved it up and to the right a bit, so the red and black in this picture were both cut, then what you see in red was what I cut out of the silver. I put the black on first, just as the black is shown in this image.... But I cut what is RED from the silver glitter Cricut Iron-On. I intentionally did not match it up, I wanted to see the red of the purse between the black and silver vinyl for a totally unique and custom look!
I used a Thirty-One skirt purse to add this design. I also am a consultant for Thirty-One if you just love this purse (you can change the red part of the purse to other colors)

I used Brooklyn Iron-On for the "photo" and Cricut Wedding for the crown. I used Kate's ABC's for the text. It is suggested NOT to put vinyl over the glitter vinyl.... I tried it and it did NOT work... however... if you layer glitter vinyl over glitter vinyl it does work!!! I was so excited for this look. I let the pink of the shirt show through so I only used silver and black glitter iron-on vinyl.


For the shirt "Picture Perfect" and for her pants "Perfect Princess"


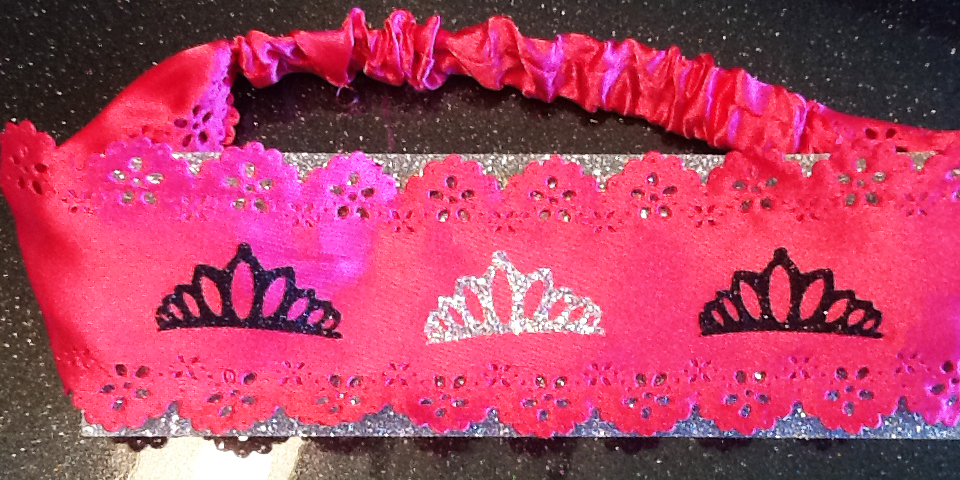
I thought the little crowns were a cute way to tie in the "Princess" theme.

The original design was just the "Picture" frame. But I wanted to personalize it a bit! I LOVE using Cricut Craft Room to make exactly what I want and like no one else has made! I am happy to share it though :)

Tutorial (recap) from Erica

My biggest tip... don't forget to FLIP the design, there is a button to do so on the expression, if you are using Craft Room scroll below to see that button to FLIP. I would even recommend putting a post it note on your machine that says FLIP, that way before you load your paper/vinyl you will remember to check if it was flipped. In one evening I forgot 4 times to flip the design and wasted my vinyl.
Here is the design that I started with in Cricut Craft Room, it is from Boho Graphics

To make it your own click on the image until the grey box appears around the design then select the HIDE CONTOUR (I circled it in purple for you)

From there you can select to hide any lines that you want.
If it is red when you click that is the line that will "disappear"
Don't worry if you make a mistake, just click that line again and it will reappear....
I just LOVE Cricut's Craft Room!!!
If it is red when you click that is the line that will "disappear"
Don't worry if you make a mistake, just click that line again and it will reappear....
I just LOVE Cricut's Craft Room!!!

After I selected all of the line that I wanted to hide I click the EXIT button right where the HIDE CONTOUR button was.

Here is my image with the lines hidden....
I flipped this design then I cut it out of Cricut iron-on lite vinyl.

Next I went back into the HIDE CONTOUR and i hide the letters L V E then i clicked on the heart image below to make it reappear. I FLIPPED the design and cut it from the Cricut iron-on glitter vinyl.

Don't for get to FLIP your image before cutting. There is a purple circle around the FLIP left to right (or some people call it mirror function)

Helpful links.....
Here are some of the links that I talked about during Ustream....
Kiss Cut Settings
Logo Placement Guide

To date over 18,000 cards have been made and donated to
Project Sunshine in Smiles from all around the world!!!
If you do not know what Sunshine and
Smiles is, it is a project set up to give cards to kids who are in the hospital to bring them some sunshine while they are there. We hope each card brings at least one smile to the faces of those kids who are in the hospital for whatever reason. So the cards should be FULL of bright sunny thoughts, try and take all of the happiness that you have and SQUEEZE it the card....
YES you can make duplicates, you can make them with whatever you would like, they do not need to be Cricut created, they can be made by kids as well. Please write a positive message inside the card for a child in the hospital. There are kids of all ages, including teenagers.... so the sky is the limit as far as rules go.
We try to NOT remind them of their illness, some are cancer patients.... so just lots of positive messages to encourage them no matter WHY they are the hospital.....
These can be from anywhere around the world....
We have had over 25 countries and 6 continents involved in Sunshine and Smiles.
We try to NOT remind them of their illness, some are cancer patients.... so just lots of positive messages to encourage them no matter WHY they are the hospital.....
These can be from anywhere around the world....
We have had over 25 countries and 6 continents involved in Sunshine and Smiles.
So the more the merrier... Thank you in advance!
You can send all of these cards to
Erica Smole
1757 Liberty Dr
Akron, OH 44313
Akron, OH 44313
Questions to EricaSmole@aol.com
No comments:
Post a Comment